Planning & Preparation | Annapurna Base Camp Trek
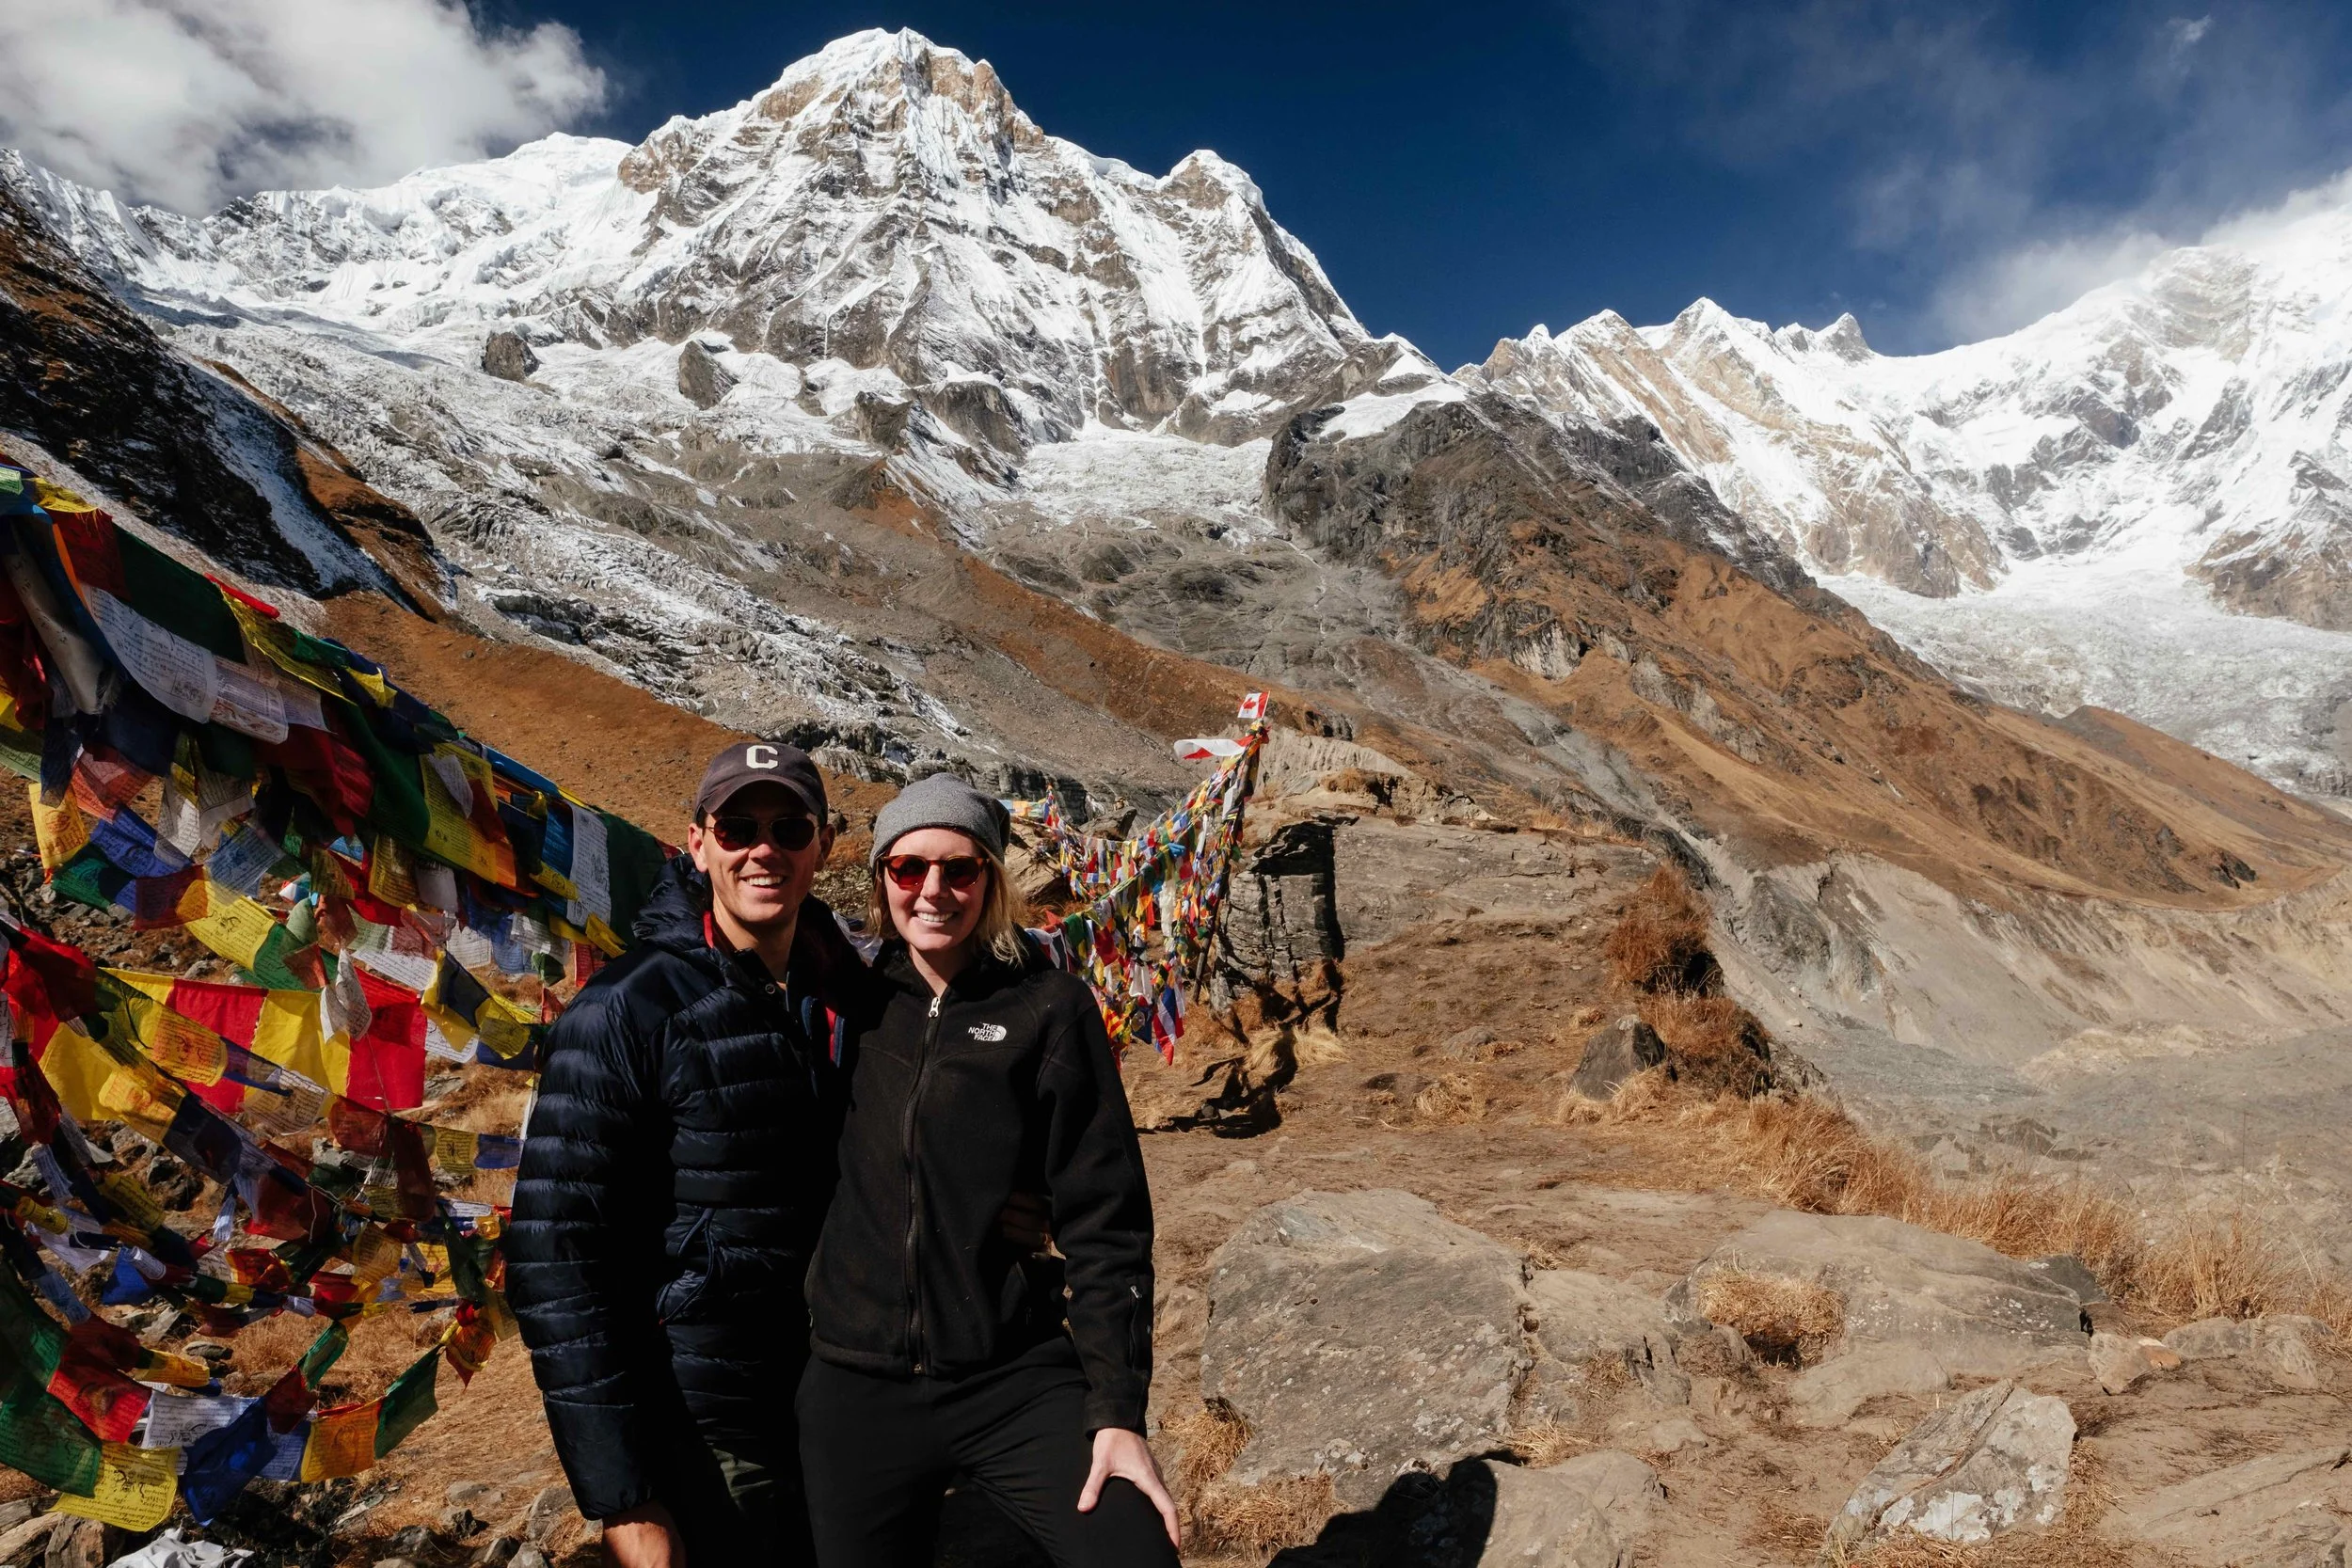
My husband and I hiked to Annapurna Base Camp in October-November 2017. We had incredible weather — Kathmandu, Pokhara, and the days we trekked at lower elevation were hot – much warmer than I had expected. It was freezing from Deurali onward to ABC, but the sun took the edge off as we couldn’t have asked for clearer skies at base camp.
This post covers details of getting to Pokhara, accommodation, dining, and down time.
This year abroad has allowed me to find a balance between pre-planning and spontaneity. I’m a planner, I like to know what I’m getting into before I arrive. But the more I travel, the more I realize being too concerned with the minutiae is a waste of time and it takes some of the exotic allure and excitement out of touching down somewhere new. Nepal was our first stop outside of Europe and I wanted to know the details of arrival, logistics of getting cash, SIM cards, a car to the hotel, where to buy what for our trek, etc. There is amount of this you can find online, but it’s all in your face when you arrive, and fairly easy to navigate so don’t overthink it.
I’m not generally one to use a traditional guidebook for travel advice and inspiration. I hadn’t considered getting one for any section of our year abroad, but after picking one up in Nepal I really saw the value in them, as they give such a great overview – allowing you to dig deeper with other resources or when you arrive as necessary. If you want to do a trek in Nepal and aren’t sure which one I’d highly recommend Lonely Planet’s Guide to Nepal’s Himalaya. We had narrowed it down to the Annapurna region before arriving in Kathmandu, and finalized our decision to do Annapurna Base Camp once we arrived - but having this book prior to arrival might have changed our decision. It doesn’t seem like you can go wrong as the entire region is incredible, but having this book, and arriving in Nepal and talking to other trekkers opened our eyes to just how many options there are.
One of the drawbacks of using the internet as your sole resource for travel planning can be that you get what you search for. Your results are largely reliant on what you already know. For a vast region like the Himalayas, a guide book gave us a great overview of options, most of which we had never heard of and likely wouldn’t have found googling “the best trek in Nepal.” It gave us a better base to continue the online search for additional details.
Ok, so what trek did we do, and why?
We choose the Annapurna Base Camp Trek and added on a few nights with a loop to Poon Hill. Budget, time, and independence were the main contributing factors that lead us to choosing this trek. We were traveling on a budget and did not want the additional expense of a guide or a porter, and Annapurna is one of treks in the region that doesn’t require that you use a guide. Our time was somewhat flexible, but we felt a 10-day trek was a good distance, especially since we were using rented gear (which was not ideal - more on that later.) We wanted to move at our own pace – we had read that a lot of guides set the pace and are somewhat inflexible about changing it up. We wanted the flexibility to get started each day when we were ready, stop when we needed a break and to hike further or shorter than planned on a given day based on how we felt.
We were very happy with our decision. We had a basic itinerary for our trek, and changed it up as needed. We started each day early, and never had trouble finding accommodation which was our largest concern, as we had heard that it can be hard to find a place to sleep without a guide who books your accommodation, but we had no issues - we arrived between noon and 2pm to most villages and easily found a private room.
Arrival in Kathmandu
The arrival process in Kathmandu was quite disorganized. There were several cues, so ask others to make sure you are waiting in the right place, as the signage is unclear. When we arrived we had to complete a physical visa on arrival form, so make sure you have a pen handy, as well as one at a computer kiosk. You’ll also need several passport photos. It’s a good idea to carry a few extras as they are also required if you buy a SIM card, and for your trekking permits.
The cost of the visa varies depending on your length of stay. Make sure you have cash in UDS, Euros or Pounds.
Once we were through immigration we picked up our luggage, found an ATM and purchased SIM cards. We went with the Ncell network. The coverage was great in Kathmandu and Pokhara, but was spotty to nonexistent on the trek. If being connected is important to you while trekking, I believe there are other providers that might have better coverage. It appeared that all of the porters and guides were well connected.
We booked a hotel that included airport pickup. Being bombarded by drivers and tour guides is always overwhelming when arriving in a new place, particularly in a place like Nepal, so having a trusted driver waiting is almost always worth the couple extra bucks in my opinion.
Lodging
We booked our first 3 nights before arriving in Nepal at Oasis Kathmandu Hotel. While in Kathmandu we booked a place in Pokhara for the 2 nights before our trek and ended up liking the hotel and staff and re-booked for several nights after the trek. The hotel stored our excess luggage and helped us arrange a driver to the start of the trek. More on our time in both Kathmandu and Pokhara here.
Permits
Permits vary based what trek you will be doing. For the Annapurna Base Camp trek you’ll need an ACAP and TIMS permit, and can apply for both at the Nepal Tourism Board Office in Kathmandu which is about a 20-30 minute walk from Thamel.
We went when the office opened and it was already busy, but were able to get both permits in under an hour. You’ll need a pen, passport photos, (you can also have them taken there), a copy of your passport, insurance details, and cash. At the time, each permit was 20USD.
Gear
You can rent or buy most gear in Kathmandu or Pokhara. If you are traveling for a year like we were, you can get by with renting packs, sleeping bags and poles – but if you are flying directly to Nepal, I’d suggest bringing most of your own gear. It’s hard to differentiate between what’s real and what is knockoff, and although you can find some deals in Nepal, shopping sales at home and online before heading to Nepal for important items like shoes and backpacks is recommended.
We were under the impression most necessities would be available to rent, but after arriving realized that most shops want you to buy their products so little is actually available to rent. The two items that seem widely available – and of good quality – to rent are down jackets and down sleeping bags. We were only able to find one shop that would rent packs, it was more difficult than I thought it would be, and we ended up with very poor quality, uncomfortable packs. In fact, the one place we found that would rent to us only had one size, not ideal. The pack fit me reasonably well, but was far from light or comfortable, and it was much to small for Dan’s height and build.
I did some research about the best shops to buy and rent gear from before arriving, but there are just too many and they aren’t that different from each other. So, you have to take your time and shop around a bit for price and quality if you are intending to rent or buy gear for your trek. Once we found somewhere to rent packs, we ended up getting most items from the same shop in order to negotiate a better price.
We rented: packs, poles and sleeping bags from Sports Wear International, and purchased socks, headlamps and a few other small items we also needed. The packs worked, but were not ideal, the sleeping bags were clean and kept us warm, and one of my poles broke in the first few hours of the trek.
Essentials
A good backpack. Unless you’re traveling for an extended time, bring your own. This along with shoes are the two most important items in my option. If you are hiring a porter this is not an issue, they somehow manage to run up the mountain with 3+ packs strapped together on their backs, leaving you with a light day pack.
Comfortable Shoes. We didn’t buy fancy hiking shoes, we wore what we were comfortable in. Dan purchased a pair of Salomon trail running shoes in Kathmandu and I wore a pair of Nike running shoes. We also each had a pair of sandals we could hike in if necessary when crossing wet areas to avoid getting our hiking shoes wet, and during the day post hike. The trails were dry for most of our trek and we were able to keep our shoes mostly dry. We were lucky with the weather, but conditions vary dramatically.
Clothes. The climate changes substantially during the trek, we wore shorts and tee shirts at the lower elevations and were drenched in sweat. As we got to higher elevations we wore thermals and leggings under our hiking pants and down jackets. We each had an additional pair of pants / leggings that could be worn at the tea houses. They could also be worn hiking so they weren’t for a single purpose, but having two pairs ensured we’d have something dry to change into at the end of the day. Having two lightweight, quick dry shirts was essential, one short and one long sleeve, and a few additional layers for the upper elevations, including a down jacket. We were also very happy to have a warm socks, a hat, beanie, buff and gloves.
Water. Have a good water bottle and filter. We used a steri-pen, but it unfortunately stopped working on the trek so we switched to chlorine taps that we had as a backup. Water bottles can be purchased along the hike, but there is no infrastructure for removing trash so be a good human and bring your own bottle, plan accordingly pack-out any rubbish.
Cash. This might seem obvious, but with our reliance on credit cards it is easier to forget than you might think. Have enough rupees for accommodation and meals, and transportation to and from the start of the trek. Don’t wait until the last minute to find and ATM to pull out cash – most of them in Pokhara didn’t work for us so it took some time to find one that functioned and had money.
Snacks & Food. It’s incredible to trek through such a remote area without worrying about carrying all of your food and water. There were spigots along the way, and hot meals waiting every couple of hours. It’s a good idea to have a few nutrition bars to get you through when needed, but you can also buy candies and fruit along the way.
Maps. We found having a paper map and the maps provided in the lonely planet book very helpful. Maps.me also worked surprisingly well, with the compass on our phones helping out occasionally. There are plenty of others on the trail who are happy to help out, so if you are uncertain where to go don’t be afraid to ask another trekker, guide or porter.
Miscellaneous. There were several mornings we were up before the sun, so having a headlamp was very helpful. Bring a kindle or good book and a deck of cards, there is a lot of time in the afternoon to relax at the tea houses.
This post covers details of getting to Pokhara, accommodation, dining, and down time.